When people discover bed bugs, one of the first things they reach for is a box of garbage bags. It makes sense. Bagging up clothes, bedding, and belongings feels like a quick way to trap the bugs and keep them from spreading.
Used the right way, garbage bags are one of the most useful tools you have during a bed bug problem. Used the wrong way, they can spread bed bugs to clean rooms, give you a false sense of security, or delay the treatment you actually need.
Here’s how to use them properly.
What Garbage Bags Can and Can’t Do
Before you start bagging everything in sight, it helps to understand what bags are good for.
Garbage bags can:
- Contain infested items so bugs don’t spread while you move them
- Keep clean, laundered items protected until treatment is complete
- Help you safely throw away heavily infested belongings
- Make it easier to clear rooms so technicians can treat them properly
Garbage bags can’t:
- Kill bed bugs on their own
- Replace professional treatment
- Starve bed bugs out quickly
That last point matters. Adult bed bugs can survive for months without feeding, especially in cooler conditions. Sealing items in a bag and waiting rarely solves anything. Bagging works best as part of a full treatment plan, not as the plan itself.
Choose the Right Bags
Not every bag is up to the job. Look for:
- Heavy-duty or contractor-grade bags that won’t tear easily
- Clear bags if possible, so you can see what’s inside without opening them
- Bags with drawstrings or sturdy ties to make sealing easier
- Large zip-top storage bags for smaller items like phone chargers, books, and toiletries
Thin kitchen bags can rip when you carry them, which defeats the purpose. If heavy-duty bags aren’t available, double-bagging is a good backup.
Get an Inspection Before You Start Bagging
It’s tempting to start packing everything up the moment you spot a bug. But moving items around before a professional has looked at the space can spread bed bugs to rooms that weren’t affected and make the infestation harder to map out.
A proper bed bug inspection shows exactly which rooms are affected and how far the problem has spread. Once you know that, you can bag strategically instead of turning your whole home upside down. Your pest control provider will usually give you a prep checklist that tells you what to bag and when.
How to Bag Items Step by Step
1. Bag Items Inside the Affected Room
Never carry loose bedding or clothing through your home. Bring empty bags into the infested room and fill them there. This keeps bugs from dropping off onto carpets, furniture, or hallway floors along the way.
2. Don’t Shake Things Out
Shaking sheets or clothes before bagging can flick bed bugs and eggs onto the floor or nearby furniture. Gently fold or roll items and place them straight into the bag.
3. Don’t Overfill
Leave enough room at the top to tie the bag securely. Overstuffed bags are more likely to tear or come undone.
4. Seal Tightly
Twist the top of the bag, fold it over, and tie it firmly or secure it with tape. For extra protection, place the sealed bag inside a second bag.
5. Sort and Label
Separate items by how they’ll be handled. Simple labels like these help a lot:
- Wash and dry on high heat
- Dryer only
- Leave in room for treatment
- Throw away
6. Carry Bags Directly to the Laundry or Exit
Move sealed bags straight to the laundry area or outside. Avoid setting them down on couches, beds, or carpets along the way.
Washing and Drying Bagged Items
Heat is what kills bed bugs, not the bag. Once your items reach the laundry room:
- Open the bag directly over the washing machine and empty it into the drum without sorting or shaking
- Throw the empty bag into an outdoor garbage bin right away
- Wash on the hottest setting the fabric care label allows
- Dry on high heat for at least 30 minutes
Items that can’t be washed, like shoes, stuffed toys, backpacks, and throw pillows, can often go straight into the dryer on high heat for 30 minutes or more. Large items like comforters may need a laundromat with commercial-size dryers.
Storing Clean Items Afterward
This step is where many people slip up. Once items come out of the dryer:
- Put them into brand-new bags, never the ones they came out of
- Seal the bags tightly right away
- Store them in a room that has been treated or wasn’t affected
- Keep them sealed until your pest control provider confirms the infestation is gone
Unpacking too early, or putting clean clothes back into an untreated dresser, can undo all your hard work.
Throwing Away Infested Items
Sometimes items are too heavily infested or not worth saving. If you’re getting rid of something:
- Seal smaller items in heavy-duty bags before carrying them out
- Wrap mattresses or furniture in plastic before moving them through your home or building
- Label or mark discarded furniture so neighbors don’t take it home
- Take bags directly to an outdoor bin rather than leaving them in hallways or garages
Before throwing out expensive furniture or mattresses, ask your technician. Many items can be treated and saved, especially with heat treatment.
Common Bagging Mistakes to Avoid
- Bagging everything before an inspection, which can spread bugs and hide where they’re actually living
- Leaving bags sealed for weeks in hopes the bugs will die on their own
- Reusing the same bags for clean and dirty items
- Putting pesticides or foggers inside bags, which is unsafe and not effective
- Storing bags in a closet or under the bed in an untreated room
- Moving bagged items to a friend’s or family member’s home, which can start a new infestation there
Can You Freeze Items in Garbage Bags?
Freezing can work for small items that can’t be heated, like certain electronics or delicate fabrics. The items need to be sealed in bags and kept at -18°C or colder for at least four days. A household freezer may not stay cold enough if it’s packed full or opened often, so this method is best for small, important items rather than large loads.
Garbage bags are a helpful tool for containing bed bugs, protecting clean belongings, and preparing your home for treatment. The key is to bag items inside affected rooms, seal them tightly, use heat to kill the bugs, and store clean items in fresh bags until the problem is fully resolved.
Bags won’t get rid of bed bugs on their own, though. Starting with a professional bed bug inspection helps you understand the problem and use bagging as part of a plan that actually works.
Why Toronto Homeowners Trust Us With Bed Bugs
We have been helping Toronto and GTA households deal with bed bugs since 1998, with more than 1,500 bed bug jobs completed. Every visit starts with a detailed, room-by-room bed bug inspection by a technician holding a PCO license from Ontario’s Ministry of the Environment, so we can locate eggs, nymphs, and adults before recommending a plan.
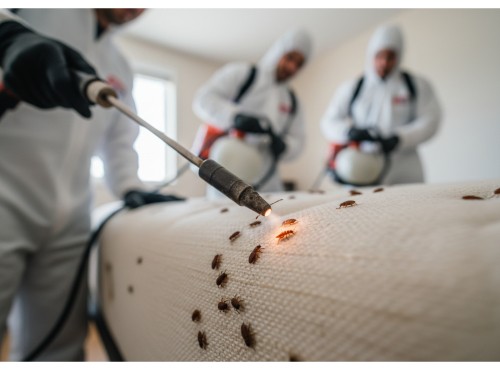
We give you a clear prep checklist, including exactly how to bag and launder your belongings, so nothing is left to guesswork. Our thermal heat treatment reaches deep into furniture and wall voids, and we back our work with a 6-month warranty, free re-treatment, and a follow-up inspection. With same-day appointments and 24/7 availability, we’re ready when you need us.